35. Converting Struts to Uprights
|
The cut-off height and resulting ball joint center-to-center will have a dramatic impact on the behavior of the front suspension geometry. A person could spend hours deliberating over what geometry is best for their build. There are a variety of software programs that can be downloaded (some for free) if you are so inclined, but this led to a situation of "which came first, the chicken or the egg?" Knowing that I could choose any height I wanted left me with too many options and too many decisions. I quickly found myself frozen in a point of indecision. A terminal condition that many engineers deal with on a regular basis known as "analysis paralysis." |
|
|
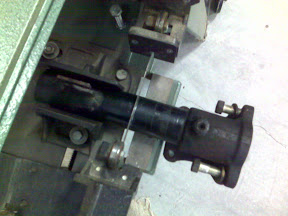
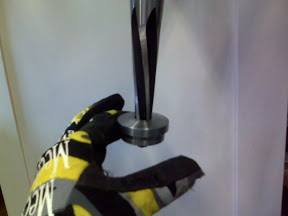  I had a local machine shop fabricate a custom strut adapter. The adapter was designed to just slip into the top of the cut-off strut. The outer diameter of the adpater agrees with the OD of the strut, making for a smooth look and providing plenty of welding surface. I applied a finishing treatment to the adapter using a high quality 7 degree taper reamer designed specifically for the ball joints that I sourced from a typical stock-car catalog. Surprisingly, I didn't need a jig to machine the taper. As shown here, I am literally holding the adapter in one hand while the taper reamer is running on a drill press at very slow speed with plenty of lubricant. I also reamed out the bottom on the RX7 strut assembly, which is actually a removable steering arm and ball joint holder (not shown). The resulting asesmbly will have both castlenuts hidden inside the strut tube for a clean, dare I say, "elegant" assembly. I had a local machine shop fabricate a custom strut adapter. The adapter was designed to just slip into the top of the cut-off strut. The outer diameter of the adpater agrees with the OD of the strut, making for a smooth look and providing plenty of welding surface. I applied a finishing treatment to the adapter using a high quality 7 degree taper reamer designed specifically for the ball joints that I sourced from a typical stock-car catalog. Surprisingly, I didn't need a jig to machine the taper. As shown here, I am literally holding the adapter in one hand while the taper reamer is running on a drill press at very slow speed with plenty of lubricant. I also reamed out the bottom on the RX7 strut assembly, which is actually a removable steering arm and ball joint holder (not shown). The resulting asesmbly will have both castlenuts hidden inside the strut tube for a clean, dare I say, "elegant" assembly. |